Sunday, June 29, 2008

The mansard roof goes up, the front windows go in, and a peek at the south facade


The Third Floor mansard roof and the new cornice (with integrated gutter) are almost finished construction. Unfortunately, the existing cornice was rotted out and fell apart when they were trying to remove it...so what we're going to do is rebuild the framework for it and acquire salvaged corbels from Provenance Architectural Salvage in order to restore it the best we can. It was really exciting to see the mansard roof go up as it is one of the most prominent features of the house. As you can see, the window in the master bedroom is quite large and will bring an incredible amount of northern light, along with a great view. Due to the nature of the sloped mansard roof, this window has a very deep sill. We have decided that instead of constructing a typical window (flower) box here, we are going to install a shallow planting bed that will have similar plants as the green roof above. Kind of a miniature green roof.

Also, the Kolbe double-hung windows have been installed in the front facade and they look great! We are very happy with them and the contractor has had nothing but good things to say about the quality.


A first look at the south facade. The sun shades have yet to be installed over the large windows.

Monday, June 23, 2008

The facade comes down & the view from up top


Now you see it...now you don't. The old brick face came down today. The image on the left shows the facade a couple of days ago and the one on the right is from today. It was sad that we had to lose it but there was simply too much spawling and with all the renovation work that's been done, it would have most likely gotten worse over time. She stood strong for over a hundred years but it was time to say goodbye. I would have liked to reuse these bricks but we couldn't because the new facade is taller and many of them were cracked already. The new brick face will be stronger and much straighter. We will be rebuilding the facade with locally salvaged bricks. The biggest challenge now is finding bricks that are as good as the ones that were in our original facade. They were turn of the century 'engineered' (very modular) bricks called "iron spots" and are highly sought after now. I have gone to at least 5 different salvage yards to look at bricks and none of them "stack up" to the ones we had. But I have another week or two before the new bricks needs to go up and I do have a few different people on the look out for me.

The brick portion of the facade is only two stories. The third floor facade (the wood framed area with the big window) will be getting a 'mansard' roof (a very steep sloped roof...almost more like a tilted wall). This is not yet constructed. A mansard roof at the highest story is a fairly common Philadelphia style facade element. [The main reason we decided to do a mansard here was due to the fact that most of the homes on this block of Montrose are two-story, so we were able to maintain the two-story scale of the street by keeping our cornice line and slightly stepping back a mansard at the third story.] This portion of the facade will be clad with a flat seam, folded panel product called Zalmag.
Zalmag custom-made panels have a service expectancy of a lifetime (or two). The panels have a unique galvanized coating on steel that consists of 1% Aluminum, 3% magnesium, and the rest is Zinc. It is made from 95% recycled material and is 100% recyclable. It weathers to a nice blueish-gray tone.


From the first and second floor looking out with no facade


The spectacular view from up top. The blue tarp in the bottom center of the image is our roof.

Wednesday, June 18, 2008

Water management

One of the biggest challenges in sustainable design is how to properly manage the water that falls from the sky onto your building and your site. There are a few different schools of thought on this topic. These range from 100% on-site management to channeling all of your run-off into the city's storm water system.

There is also an interesting dialogue happening now between the various governing entities within the city that seems to have conflicts of interest and can be quite confusing to the rest of us. The Department of License & Inspections seems to approach the issue from one end and requires that all storm water be collected and channeled directly into the the City's piping system (with downspout boots and site drains.) I suppose I understand this mode of thought in that they are simply trying to prevent storm water run-off from going places it shouldn't and causing damage and erosion. The PWD - Office of Watersheds, on the other hand, approaches the issue from the other end and is encouraging people NOT to connect to the City's infrastructure by taking measures to manage your storm water 'on-site'. This can be done in basically two ways: harvesting and retention/infiltration. After speaking with a number of landscape architects, green roof designers, and environmental planners, we have decided that the Office of Watersheds' approach is the right way to go. Now it does appear that L&I and PWD are approaching a common ground on some of these issues and PWD actually wants to register all on-site stormwater management projects with L&I.

There's just too much pavement these days. Basically, when it rains, water that falls on impervious surfaces is typically channeled into sewer pipes that travel 'downhill' and eventually lead directly into our rivers, carrying with it many pollutants. By allowing rain to slowly infiltrate directly into the ground, it is able to be naturally 'filtered' by the earth before it makes it's way into the water table and/or rivers. Also, this infiltration allows "groundwater" to recharge naturally, at it's own pace.

Every drop of water that falls onto the earth's surface, falls within what is called a "watershed". A watershed is
an area of land where all of the water that is under it, or drains off of it, goes into the same place. Watersheds cross all boundaries. No matter where you are in the world, you're in a watershed. [From the EPA's website]

The ultimate goal behind PWD's mission here is "to restore our watersheds, by converting our streams, creeks and surrounding green spaces into healthy systems that local residents, along with native fish and wildlife, can use as amenities, sanctuaries and habitats. Stormwater management projects will not only help protect our invaluable drinking water sources, but they will help green the city, restore our waterways and improve quality of life for all residents."

So here's our strategy...

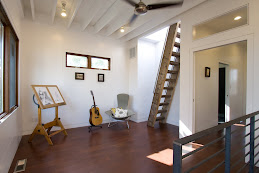
1. Green Roof. We are moving forward with the green roof installation (opposed to the white membrane). We were back and forth for a while as to whether or not we would be able to install a green roof. The only thing holding us back was cost. We always knew it was the right thing to do (and even planned for it structurally) but the choice comes with a considerable fee...especially to do it right. But after many conversations with different folks, we believe that we will most likely be able to recoup the cost in the purchase price of the house, which is all we are really after in regards to this decision. Also, we have decided against going with the 'modular tray' system and are pursuing a more conventional installation. I have had the privilege of speaking with and getting some advice from Charlie Miller with Roofscapes, Inc. Charlie (the 'guru of greenroofs') is responsible for such projects as Chicago City Hall and Life Expression Wellness Center. After speaking with him, I was able to establish the waterproofing and root repellent system, thickness of media, and types of plants best suited for this project. He then pointed me in the direction of JIG. JIG is the construction arm and 'green roof division' of Onion Flats, a design/build/development firm in Philly. I am meeting with them next week to discuss the possibilities of the project. As I have continually admired the work of Onion Flats over the years, the possibility of a collaboration with them on this project is exciting.


Various types of green roofs

Benefits of a green roof:
  • Longer lifespan of the roof membrane
  • Energy savings due to increased insulation
  • Sound insulation
  • Aesthetic amenity (your own little park)
  • Improved air quality and biodiversity
  • Reduces urban heat island effect
  • Storm water: in summer, can retain 70-90% of the water that falls on them; in winter they can retain between 25-40%
Obviously, the last item is the one that directly relates to the topic discussed here.

Green roofs have actually been around for 1000's of years and other countries have been utilizing them much more than the U.S. [From the Greenroofs for Healthy Cities website]: "In North America, the benefits of green roof technologies are poorly understood and the market remains immature, despite the efforts of several industry leaders. In Europe however, these technologies have become very well established. This has been the direct result of government legislative and financial support, at both the state and municipal level. Such support recognizes the many tangible and intangible public benefits of green roofs." Although, I would venture to say that in the last couple of years (and since this statement was written), the green roof industry has exploded in this country, with no end in site. And, with the new administration here in Philly (and soon the U.S. government!!), we are seeing some real exciting changes for the better.

2. Rain Barrels and Rain Gardens. The remaining amount of water that does not get absorbed by the green roof will travel down a downspout and into a Rain Barrel where it will be stored and used for watering the plants in the backyard. A pipe will also be connected to the bottom of the rain barrel which will slowly feed water into a Rain Garden, located under the kitchen windows.


Rain Gardens and a Rain Barrell

In addition to helping recharge groundwater as well as preventing pollutants from traveling into rivers, rain barrels also help lower water costs when the stored water is recycled for landscape irrigation. Keep in mind..."Whether you buy or build a rain barrel, the most important thing to remember is that they are only effective at stormwater management when the stored water is emptied in between storms, making room in the barrel for the next storm." (from Philadelphia Stormwater Management Guidance Manual)

To read more about rain barrels, rain gardens, and many other things you can do as a homeowner to help successfully manage stormwater, check out "Appendices K-L: Voluntary Small Sites Checklist" at www.phillyriverinfo.org
.

3. Pervious paving. So I know we have mentioned in the past that we intend on paving the backyard with the salvaged bricks from the demolition. Outside of the sustainable strategy of using reclaimed material, this feature will also be beneficial to our water management. Now I realize that this is not "pervious paving" in the true sense of the term as the actual brick pavers are not pervious (which they do make and and which work beautifully) but it's more the surface as a whole system that will allow water to infiltrate...as opposed to pouring a solid concrete slab which is the usual strategy. You see, these bricks will be 'sand set' (not grouted) and laid on bed of compacted gravel about 8" thick. This will allow the water that does fall onto the back patio to infiltrate into the ground. Another option that we are pursuing is having a raised wood deck as the central surface with gravel and pervious 'landscape fabric' beneath. We would then find another use for the salvaged bricks...maybe pave the path of the alley running along side the house. Both systems would allow water to percolate into the ground, and in the end, its mostly an aesthetic decision. Also, we are planning on creating a continuous planting bed (no bricks), that will have an increased absorption capacity, around the perimeter of the back yard in order to catch any overflow during heavy rains .

4. Storm Water Planters.
The Philadelphia Water Department Office of Watersheds has embarked on an ambitious program to install storm water planters that are designed to capture and infiltrate street run-off. There was actually a presentation of this at PHS ( Pennsylvania Horticultural Society) on Monday night that Emily and I (and Nicholas) attended. It was a very nice event with a great turnout. The concept is pretty simple: basically, instead of having continuous impervious paving along the street (with the occasional tree), we can create small stretches of pervious planting beds (up to 20' long) that will infiltrate sidewalk and street run-off. There is also a scheme to do an island 'bump out' that essentially takes the place of a parking space and replaces it with a lush vegetated area that can capture run-off. Obviously, these also greatly enhance the aesthetic of the street as well as contribute to better air quality.


We are tearing up our sidewalk very soon. I approached a couple of PWD representatives and told them about what we are doing here at Montrose and how we are trying to successfully capture all of our own storm water. They were enthusiastic about the benefits that this system could provide for our project. I hope to meet with them soon to continue discussing the concept of storm water planters.

So... from the storm water planters at the street, up the facade, across the green roof, down the spouts to the rain barrel and rain garden, along the pervious paving at the patio, and all the way back to the planting beds along the fence, we are doing our best to properly manage all of the storm water (or at least the "first inch of rain", which I hear is the most important) on our site.


Monday, June 16, 2008

Some interesting energy facts

I was looking into some more specifics about energy savings in regards to using CFLs and LEDs for the lighting and I found some statistics that were quite startling. The Energy Information Administration website (Official Energy Statistics from the US Government) has a lot of great information about all kinds of power related issues. Check out the section on Potential Savings related to lighting. Here are just a few of the things they talk about:

The overwhelming majority of lights in residential households are incandescent--the least energy efficient of all light types . If households replaced the most intensively used bulbs with compact fluorescent bulbs, they would see a sizable savings in their electric bills. The total U.S. household energy that would be saved by replacing all incandescent bulbs used 4 or more hours per day would be 31.7 billion kilowatthours (kWh) annually, or 35 percent of all electricity used for residential lighting. ...
compact fluorescent bulbs pay for themselves in 1.7 years.

The life-cycle cost of a light bulb includes the cost of the bulb itself, as well as the cost of the electricity required to power the bulb. Electricity costs are a large percent of the life-cycle cost of incandescent lights. Depending on the electric rates, electricity costs account for 78 to 91 percent of the life-cycle cost of incandescent lights, but only 37 to 63 percent of the life-cycle cost of compact fluorescent bulbs.


Compact fluorescent bulbs need about one-third of the power required by incandescent bulbs to emit the same amount of light. If one wanted to replace a 75-watt incandescent bulb, a 26-watt compact fluorescent would be an appropriate choice. Therefore, regardless of electricity costs, compact fluorescent bulbs offer a three-fold increase in efficiency. If compact fluorescent bulbs, by virtue of their high cost, do not produce large dollar savings to individual households, they still result in large savings of electricity and the fuels required to produce electricity.


Of course, one of the biggest issues related to compact fluorescents these days is that they contain Mercury and how does one properly dispose of them. I found the following information (from another bloggers website) to be fairly helpful:


You should consider that mercury emissions from power plants get into rain clouds and come down in lakes and rivers, poisoning fish and the people who eat them. Coal-fired power plants in the US are the largest source of mercury, spewing 50 tons a year into the air -- about 40 percent of the total.

While the amount of mercury used in production a CFL bulb is at most 6mg, the average mercury content is 4mg. The total emissions of mercury created by a CFL bulb from electricity consumption over its lifetime is about 2.4mg of mercury. In comparison the emissions from an incandescent light bulb is about 10mg. Therefore overall CFLs result in a reduced amount of mercury emitted over the lifetime of a CFL bulb. The real gain is the reduction of 38kg of Co2 per CFL per year and an overall saving of 14% on your electricity bill.

To ensure the safe disposal of CFL bulbs you should return them to the retailer, manufacturer or to an appropriate recycling facility. Once collected the bulbs are crushed in a machine that uses negative pressure ventilation and a mercury absorbing filter allowing the mercury to be reclaimed. Therefore if you use a CFL with renewable energy and recycle it, the mercury emission level is actually negated.

If you break a CFL, clean up broken bulbs with care. Open windows and allow to circulate to the affected area. Do not allow children or pregnant women to enter the affected area. First sweep up all of the glass fragments and phosphor powder (do not vacuum), then place in a plastic bag. Wipe the area with a damp paper towel to pick up stray shards of glass or fine particles, and place the used towel in the plastic bag as well. For proper disposal of broken bulbs, the best solution is to save them for a community household hazardous waste collection. Also, you can now get CFLs with ultra-low mercury levels.


The other hazard I recently discovered relates to LEDs
(Light-Emitting Diodes) . It is not widely known to the basic consumer (yet) that LEDs contain Arsenic (a metalloid) that, although a naturally occurring element, has many negative connotations. Again, the main concern here is not that you will be exposing yourself to Arsenic if you install LED fixtures (which you are not), the main concern is about how to properly dispose of the lights if they break or when they die out. And hey, the amount arsenic used in the pressure treated wood deck that your dad built out back when you were growing up greatly exceeds the amount used is LEDs anyway. So by outlawing Arsenic in PT wood, we're much better off these days.

But keep in mind that Arsenic is commonly used in the electronics industry (as well as some cures for diseases) and I would not be sitting here typing on this computer if it wasn't for Arsenic. As far as LED lights dying out...let's keep in mind that the lifespan of a typical LED downlight is about 50,000 hours (CFL about 30,000; incandescent about 2,000) . Given that the average percentage of light usage in a home is around 2,500 hours per year, you will not have to be concerned with changing that LED light for about 20 years! By then, I would imagine we will most likely have addressed many of these concerns, if we haven't already moved on to more advanced lighting technology (and you will have long moved out of your house, anyway). The main disadvantage of LEDs (at this time) is that they cost considerably more than other lights and often have special power requirements. But in the end, the pros definitely outweigh the cons.

Advantages of LEDs:

Produce more light per watt than incandescent bulbs and can be up to 80% more energy efficient

Capable of emitting light of an intended color without the use of color filters and can be designed to focus its light. Other light sources often require an external reflectors

When dimmed, LEDs do not change their color tint, unlike incandescent lamps, which turn yellow

Ideal for use in applications with frequent on-off cycling, unlike fluorescent lamps that burn out more quickly when cycled frequently

Difficult to damage with external shock. Do not contain Mercury

Can be very small and light up very quickly

Thursday, June 12, 2008

Third Floor joists, temporary stairs, and the Second Floor plan begins to take shape


View from the Third Floor


Views of the Second Floor


At the entry, looking up the (temporary) stairs to the Second and Third Floor


The Second Floor plans begins to take shape.

A few of the sustainable products & finishes

I met with Eric King from Greenable last week to continue discussing the selection of the interior finishes for the house along with some of the other sustainable aspects. All the folks at Greenable have been extremely helpful with this project and they continue to be a great resource for information and samples of sustainable materials. The areas we are currently working on are flooring, countertops, stair treads, paints & stains, and other sheet materials. Also, we talked about the installation of the BioBased spray insulation and the timber for the sunshades on the back of the house, both of which we are sourcing through Greenable.

Flooring: We will have only two types of flooring in the house - bamboo and tile. We felt that carpet is not a very sustainable flooring strategy for a residential project.

For the bamboo flooring we are considering the Strand Woven Carbonized "Nutmeg" from Green Choice Flooring. [From Green Choice's website]: "Our Strand Woven products are made by taking strips and strands of bamboo and weaving them together. We then compress them under intense pressure and heat resulting in one of the hardest and most stable flooring products on the market today. Strand Woven Bamboo flooring is also the ideal green product because it actually uses the by product that you get when making more traditional bamboo floors. Nothing is wasted during this process." Strand Woven bamboo is 100% harder than Oak and 20% harder than Mahogany. In addition to bamboo being a rapidly renewable resource, we feel this is a great option for the floors due to its beauty, durability, and low maintenance. The cost per SF is also very competitive.


Strand Woven Carbonized Bamboo Flooring

For some of the tile (in the kitchen & bathrooms ) we are looking at recycled glass tiles by companies like Trend and Oceanside. There are some really beautiful recycled glass tiles on the market these days (that don't all look like 'sea glass'). You can get mosaics, large squares, running bond, and many other types. We are also considering locating some salvaged 'subway' tile (white, running bond) if its not too expensive. For this project, we are looking to use glass tile for the backsplash above the counter in the kitchen and also in the master bath shower. Since many of the finishes in the home will be subtle, earth tone colors, we thought that these areas might be a nice place to have some fun. Below is an example of some of the various glass tile colors and patterns we are considering.


Recycled glass tiles from Trend and Oceanside


Countertops: This has been an ongoing search for many, many months. We are still torn between a few different products. The options have included Paperstone, Ecotop, Fireslate, poured concrete, Icestone, and Caesarstone for the kitchen . I really like the concept of the Paperstone material but I have reservations about the amount of wear that the counter shows (scratches, etc). I have also heard stories about Fireslate having problems during installation and not holding up as well as one would hope. The only one we have totally settled on is Icestone for the bathroom vanities. Although, we are leaning heavily towards Caesarstone countertops ("Raven" color, honed). Caesarstone is composed of 93% crushed Quartz held together by resins. The only real drawback I see with Caesarstone is the fact that it is made in Israel and thus has to travel a long way to get to Philadelphia. The element of sustainability that deals with how much effort is involved in actually acquiring a material (i.e. the steps in the manufacturing process and the distance it has to travel to get to the project) is call "Embodied Energy". If you can get products that are manufactured locally, you cut down dramatically on the amount of 'embodied energy' related to that product, thus saving a tremendous amount fuel and energy.

On the other hand, one really great advantage to Caesarstone for this particular project is the extremely small waste factor. You see, their standard slabs are 56.5"Wx120L". Our kitchen is comprised of 2 "L-shaped" pieces (with a 36"H turn down piece at 2 ends) and a 16"Wx72"L high bar slab. The "L-shaped" pieces are 56"Wx98"L. The leftover piece from one of the "L" cut outs will be cut in half and used for the turn downs and the other will be cut in half (lengthwise) and laminated together to become the high bar slab. The remainder of the material (2 - 20"Wx56"L slabs) are good size pieces and will definitely be utilized in another part of the house. So you have to make sure you look at all the sustainable factors involved in the selection of a particular material and then prioritize those factors.

Icestone countertops, however, cover all the sustainable aspects very well - a beautiful, green product and manufactured fairly close: in Brooklyn. [From Icestone's website]:
"IceStone is proud to be the first and only durable surface in the world to receive the coveted Cradle to Cradle™ certification. Cradle to Cradle assesses products on a number of criteria, such as the use of safe and healthy materials, design for material reuse and recycling, efficient use of energy and water throughout production, and instituting strategies for social responsibility. At IceStone we manufacture our products with 100% recycled glass in a cement matrix, diverting hundreds of tons of glass from landfills each year. We operate out of a renovated, day-lit factory in the Brooklyn Navy Yard, creating U.S. jobs for workers in an eco-friendly, safe and respectful environment."


Caesarstone countertops


Icestone countertops


BioBased Insulation: [From the BioBased website]:"BioBased Insulation markets building products that allow residential and commercial structures to be more sustainable. BioBased Insulation seals a structure's thermal envelope, making it is more energy efficient, healthier, more comfortable and durable than traditionally insulated homes. BioBased Insulation also is water-blown and soy-based, so it is more environmentally responsible." "The "Bio" in BioBased Insulation is soybeans. It is an energy efficient, American-made product that incorporates natural, renewable oil-based polyols as a replacement for a portion of the traditional petroleum-based polyols found in spray polyurethane foam insulation." And for any architects/builders out there: "BioBased 1701 is a Class 1, closed-cell, air barrier that is spray applied using water as the blowing agent. It is a Class II vapor retarder at 2.5 inches, has no VOCs, CFCs or HCFCs in the finished foam.

BioBased 501 voted "Outstanding green product of the year 2003.
BioBased 1701 is GREENGUARD Indoor Air Quality Certified and Certified.


BioBased spray foam insulation being professionally installed. The reason the guy looks to be in a 'haz-mat' suit is because, as with most foams, the material is extremely sticky and should not be handled until it has fully settled in...at which point it is completely safe. They also scrape off the excess foam and recycle it for future use.

Friday, June 6, 2008

LEED update

We met with two representatives from the ECA (Energy Coordinating Agency) - our LEED for Homes provider - last week to walk the project for the first time. It was a good time to really see some progress as the contractor had just removed the roof. They were excited to see the reality of what we had only been discussing on paper up to this point.

We started in the back yard with a discussion about erosion control during construction. Currently, we were not providing any physical barrier at the edge of our property that would prevent material run-off from traveling into the neighbors yard and the street. Seeing that the back yard had been filled with a lot of debris until just a couple of days ago, it would have been difficult to set up any kind of prevention system. But now that the rear yard is clear, we can accomplish this. Usually, erosion control is taken care of with what is called a 'silt fence' - a kind of fabric fencing that allows water to pass through but prevents dirt and debris from traveling through. Seeing that this is such a small application, an alternative was offered up: Straw bales. We will place bales at the perimeter of the rear yard and at end of the alley where is meets the sidewalk. This will help contain our run-off and prevent any further erosion.

Next, we discussed the insulation of the house. I explained that we will be using the BioBased spray foam insulation throughout the entire perimeter of the house (including the existing basement walls and the new crawl space) except the roof where we are placing 8" of rigid insulation on top of the roof decking. The main reason for the rigid, opposed to the spray foam, on the roof is that we want to expose the structure at the third floor ceiling. In regards to the insulation, we are essentially talking about two things: the R-value (Thermal Resistance) and the 'tightness' of the building envelope. The minimum values we are looking to achieve are roughly R-20 for the walls and R0-40 for the roof. The closed-cell spray foam at the existing brick walls will will give us about R-20 and at the new wood stud walls, about R-30. The foam also doubles as our vapor retarder. The 8" of rigid on the roof (insulation only) will give us R-40, and it only gets better as we add material (decking) and if we end up having a green roof, that will help even more. This level of insulation, along with the Kolbe windows, which are achieving a U-value (Thermal Conductivity) of .34, will provide us with a very energy efficient building envelope. Of course, it is also very important for us to detail the connections of where all of the different surfaces meet each other so as to prevent any leakage. The reps from the ECA were quite pleased with the way in which we were tackling the energy-efficiency in regards to insulation.

I then pointed out all the salvaged material (heart pine flooring and wood joists), along with the old claw foot tub, in the basement that we were storing for later use in the project. Also, at this point they were able to see that all the lumber used in the construction was either FSC Certified or reclaimed. Lastly, we discussed the layout of the mechanical system and they offered some suggestions and examples as to how we could improve the efficiency.

In the end, it was a great initial site visit and I think everyone now has a better understanding of what we have we have done so far with the project, what we are doing now, and where we are going.